
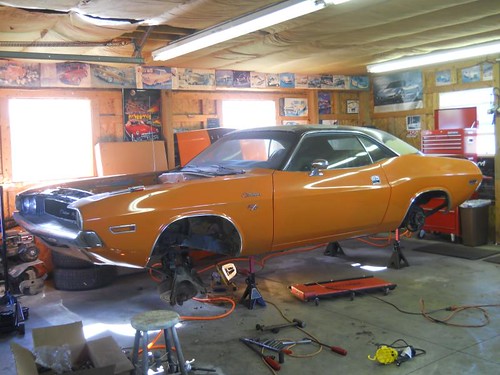
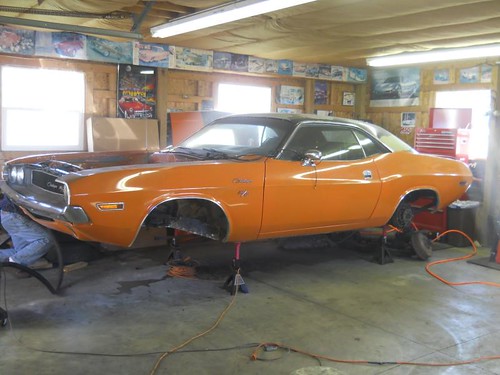
Saturday, I once again headed down to my parents to work on dad's Challenger again. Thankfully, I will be able to make another trip down in a couple of weeks. While still mostly in the cleaning of the undercarriage stage, I did some more disassebly of the front end. Between taking breaks from working on stripping the floor pans bare, I removed front end components, hoping to have the k-member removed by days end, though doubtful that would happen, having never dealt with torsion bars before. I wasn't sure I had the tools or know how to remove the k-member without hitting the internet.
First, I removed the bolts attaching the a-arms as well as the shocks, as both were the few components attaching the k-member to the car. I was very thankful to have brought my Craftsman impact with, as it made removal of the stubborn bolts much easier.
Aside from some finishing touches, the driver side pan is about 90% stripped from the rear seat to the firewall. From the rear seat to the tail, I had already previously por-15'd it and it's good to go.
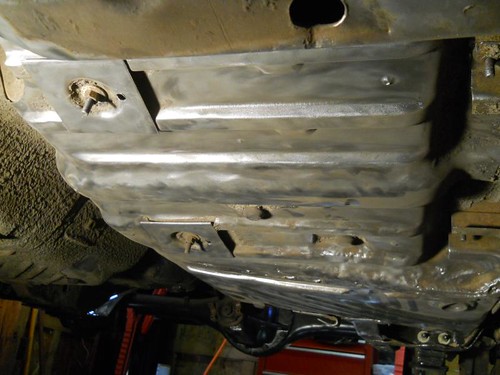
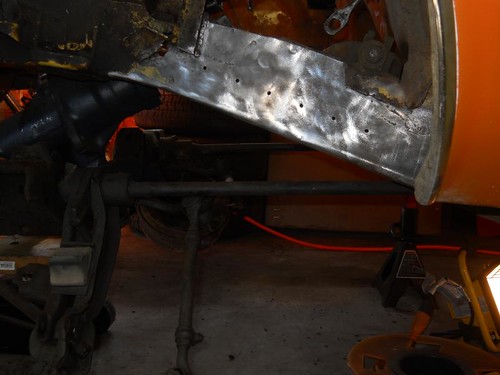
This is a picture of practically the ONLY significant rust I've come across thus far. Sadly, it's in the frame, but thankfully, it's going to be a very easy fix. Nothing some plate steel and a welder can't make quick repair of.
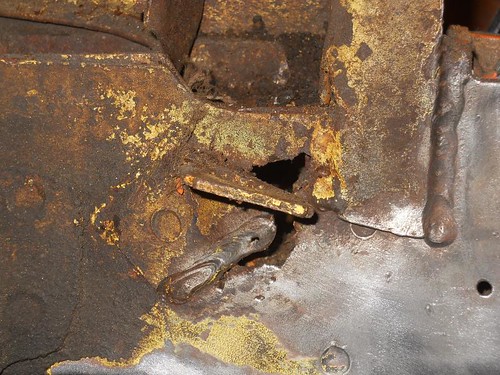
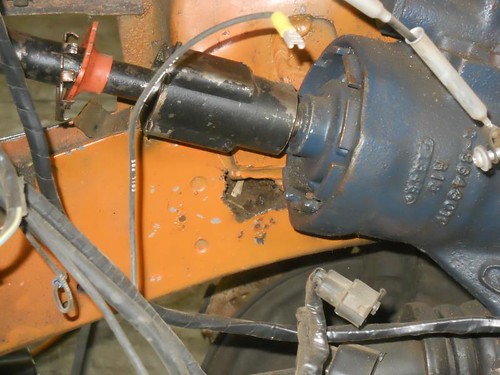
Here is the opposite side of the frame, which likely led to the rust on the other side. The brake line bracket was torn from the frame at some point, thus allowing garbage to enter the frame and sit, trapping moisture. Both the top and bottom of the frame is solid, but the sides were soft in about a 2 square inch area. These stamped frame rails and unibody construction Chryler used leaves one appreciate Chevy's subframe design that much more.
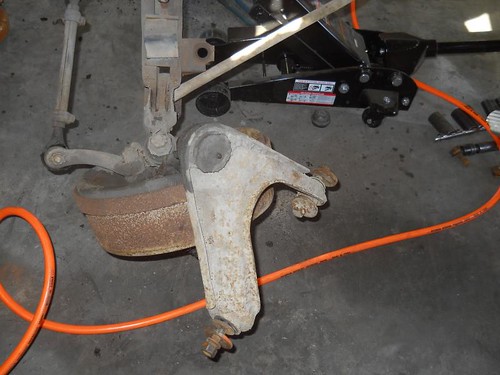
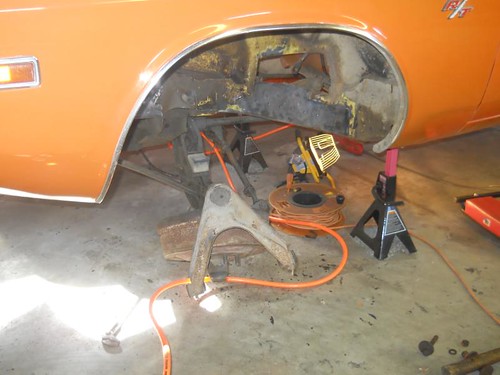
Driver side a-arm dropped.
Passenger side a-arm dropped.
After removing the 4 k-member bolts, I slowly began lowering the k-member on the jack...still unsure how the torsion bars would react, or how I would remove them.
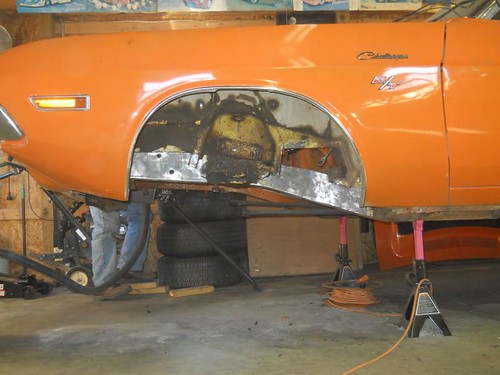
Driver side frame rail stripped. I'm pretty sure those drilled holes are a sure tell sign of some sort of repair in the past. Considering the car also had a back half repair, which was actually repaired quite well, I'm shocked that the car didn't have a salvaged title. That said, I'm thankful it didn't, as none of the repairs or items left to fix "better" change the fact that it's a real R/T car. When it's all said and done, only the best mechanics will know the extent past repairs.
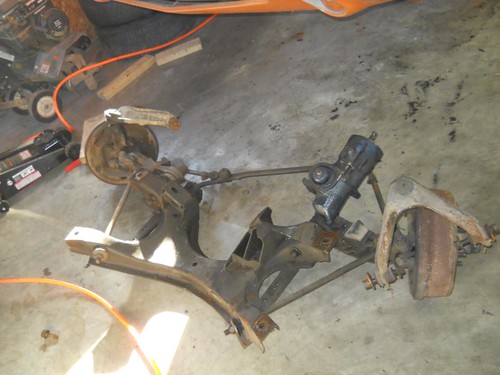
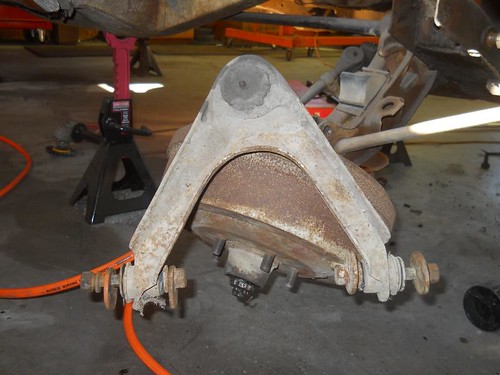
After looking at the torsion bars closely, it looked like the hex ends would simply pull out. A few taps with a steel mallet and the k-member was removed.
Now, to figure out if I can remove the torsion bars.
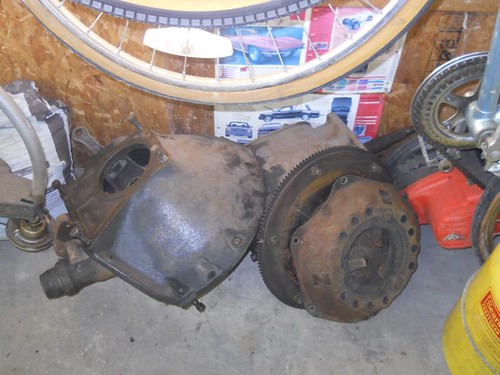
Taking a break from the car, I removed the transmission, pressure plate, clutch, flywheel, and bellhousing from the engine. We may in fact rebuild and reuse the 4 speed, as retro-fitting a 5 speed may be significantly more costly than we initially believed.
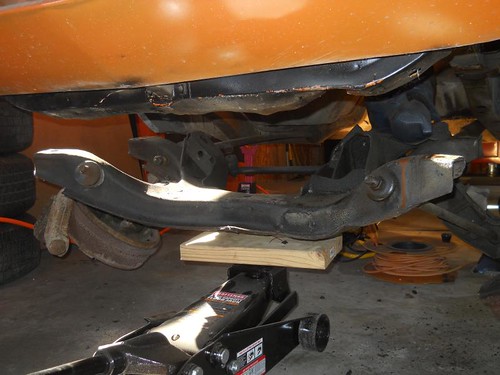
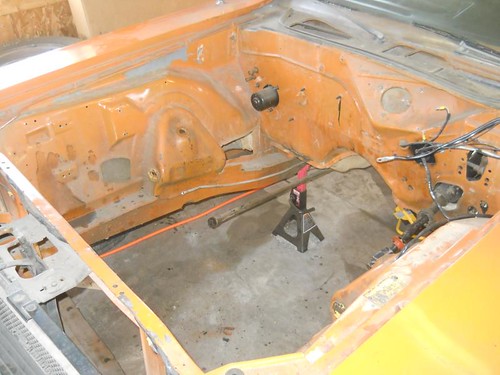
Here is the car with the whole front suspension removed, with the torsion bars still protruding.
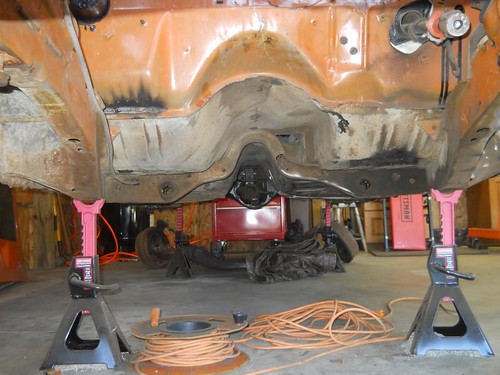
After inspecting the other end of the torsion bars, I found that only a retainer clip held them in place. After removing the clips, the torsion bars pulled straight out. From this view you can see the stripped front end, as well as the upper transmission crossmember which needs a patch or two due to holes created for who knows what. While still in the stripping/removing parts phase, soon, progress in the other direction will be under way.
We have decided to go the route of the Reilly Motorsports front suspension. It is a complete bolt-in k-member with tubular control arms, coil over springs (no torsion bars), rack and pinion power steering, and Wilwood disc brakes. The complete package will provide with streetrod suspension for this pony.
No comments:
Post a Comment