

 The driver side, with valve cover removed.
 I found a receipt for a new cap and rotor from about 2 years ago, so I wasn't planning on replacing it just yet. A last minute decision to buy a new one while at Murray's proved to be a wise choice. Some how, some way, the inside button for the coil while had broke off, and sat wedged/burned into the rotor when I found it. I'm sort of surprised the car didn't run more rough because of it.
 New cap/rotor installed. I also gave my previously installed MSD coil a quick clean up.
 New throttle body air foil installed.
 Here is where the stock air box, or perhaps I should say cylinder, was located. A rather ugly tray which I will likely remove at some point, a means to lighten the car. Every bit helps, right?
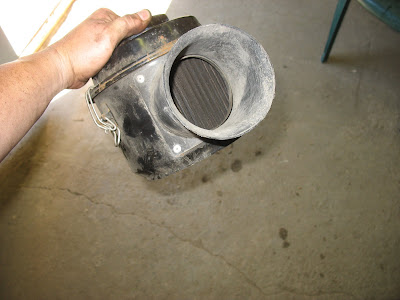 Here is the stock air box. The only opening you see faced right into the back of the radiator support. I can't imagine air flow was all that great. While still not a cold air setup, I'm sure my new installation is getting more air to the engine.
 I cleaned up/reused the stock plumbing. Here you can see the K&N in place.
 Next I got started on the valve seals, and removed all the rocker arms. Couldn't help but think how nice it would have been to have a set of 1.6 ratio roller rockers to install.
 The roller rockers, in order of disassembly.
 Here is the hose you need to install in the spark plug port. Without it, your valves will drop into the cylinder once the springs are removed. Not shown, I also picked up a valve spring compressor from Sears for about $15. I already had a flexible magnet, which is a must when it comes time to remove the valve locks.
 The stock o-ring seals/umbrellas were either in very bad shape, or worse, non-existent! In my opinion, both were a very poor design by GM. Neither seal seems to withstand the heat/conditions, and both become brittle and destroyed after a short time.
 I've always had great luck with anything by Fel-pro, and these seals look much better than stock. The o-rings however, I don't expect them to hold up any better. I did valve seals on my first Firebird twice during it's 60,000 mile life span. Both times the o-rings were cooked/destroyed from becoming brittle. Ideally, one should have the heads removed and machined for teflon locks, and simply leave the o-ring seals off.
 Took me a bit to figure out how to actually remove the A.I.R. pump, as it initially seemed integrated into the MONSTER accessory bracket. I eventually realized there were a couple of large torix bolts hidden behind the pulley. Once removed, I could access them, though I lacked a torix bit large enough. After a run to Sears, I was able to remove them both without trouble. I did used a longass torque wrench so I had plenty of leverage. Last thing I wanted to do was strip the heads, which torix bolts are notorious for...another horrible invention in my opinion.
 Once the pulley was removed you could see the pump.
 With the pump removed, a big void remains...but a big void weighs less than a bulky emissions pump and plumbing! I figure I lost about 10-15 lbs off the front of the car.
 The pump, probably weighing a good 10 lbs in itself.
 After some valve lash adjustments with the engine running, the only way I've found to accurately adjust hydraulic lifters, everything was lookin' good and running smooth. 136,600 miles and going strong!
No comments:
Post a Comment