Friday, March 07, 2008

2008 Detroit Autorama

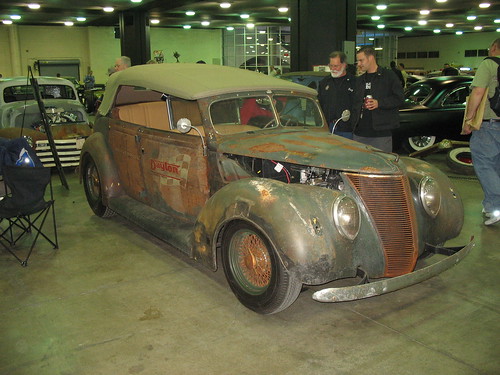
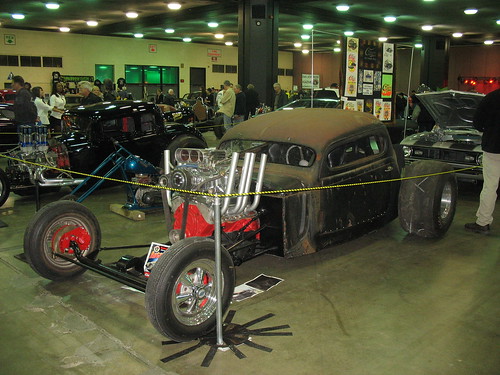
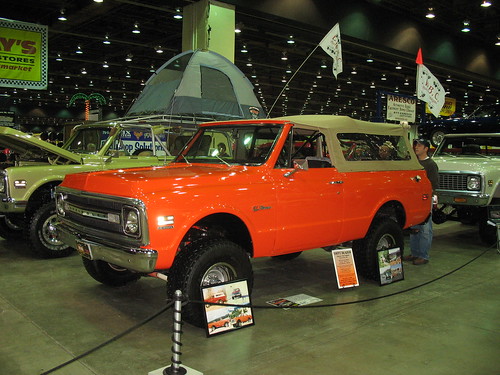
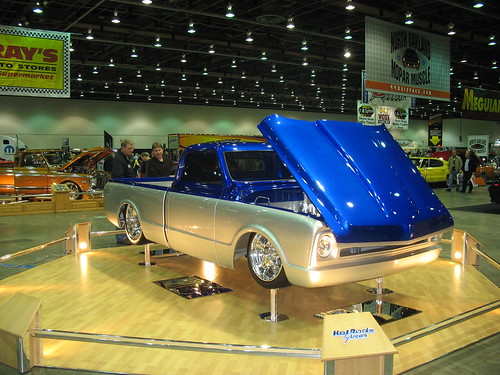
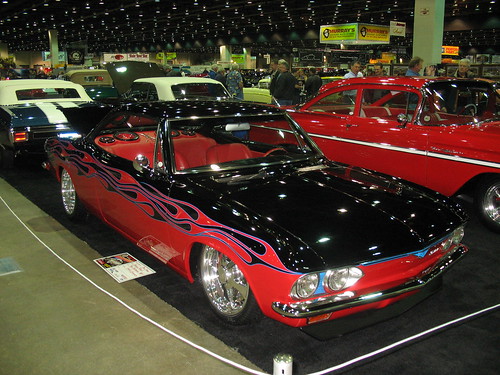
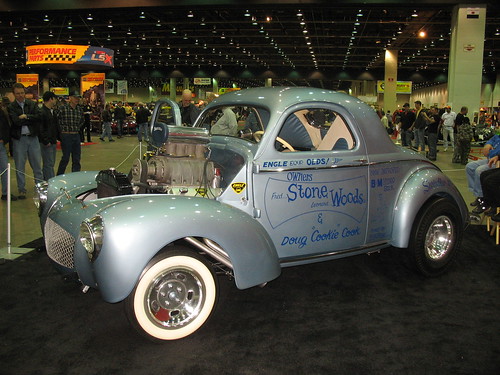
As promised, I just returned from the 2008 Detroit Autorama with tons of pictures to share, almost 300! This year once again proved that only the best cars make it into the show. No longer do you see cars with el-cheap-o Maaco paint jobs waving back at you. Another change this year was the lack of the over priced piece of shit cars for sale in the car corral, as it was gone all together, though it was replaced with more stands selling diecast models, car literature, and junk. The imports and Rat Rods were once again on display in the basement, though the imports seemed to be lacking in numbers this year, as did the Rat Rods in my opinion.

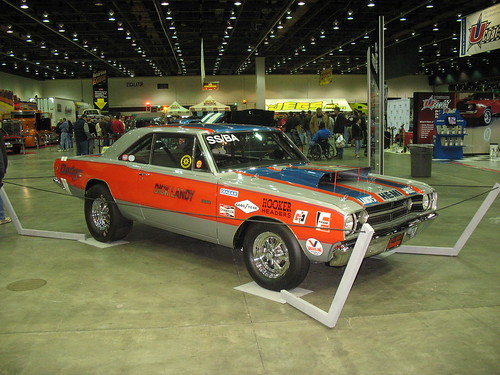
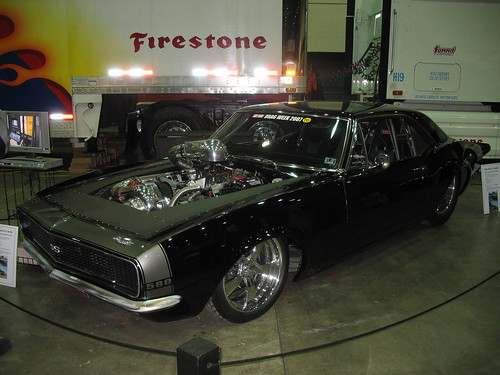
Another thing I noticed this year is that muscle cars are continuing their trend of following in the footsteps of street rods. More and more custom body work, modern drivetrains, interiors, bigger wheels/tires, and modern suspensions. Perhaps the most significant proof of this trend was among the Mopar faithful. If there was anything I learned during my few years owning my 1970 Challenger R/T, it's that the Mopar people are often the most resilient to change.

At this year's show I saw several Mopars that had been cut up, bodies customized, aftermarket suspensions, powertrains, and even custom interiors. If the Mopar fans are giving their muscle cars the "street rod treatment," then you know it's more than just a passing fad. So without further delay, here are just a few of the pictures from the show, along with captions. I'll include a link at the end to the rest of the cars.


The Finkosel.

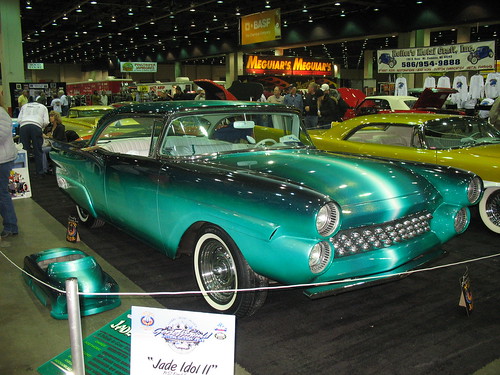
Pretty in prink, with a big motor under the...uhh...over the roof!


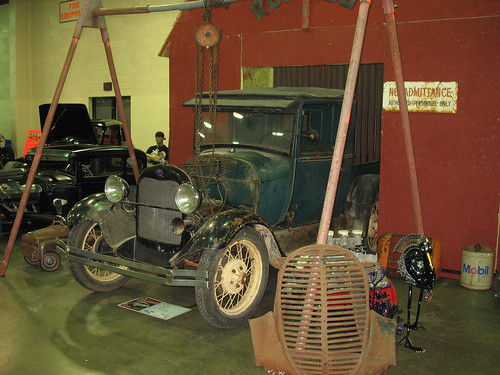
Cool display.


1,500 hp...and it's streetable!


Big...yellow...different.

Sharp two tone pickup.

Never been a big fan of these throwback customs, but there was just something about this old Buick that really caught my eye.

One of the sweetest Corvairs I've seen.


A good 4 or 5 of these 2nd generation Firebirds made the show, though not a single 3rd generation like I own. Just goes to show that these cars are gaining popularity. I'll admit, there was a time when I thought these, along with their cousin Camaros, were among the ugliest F-body cars to hit the road. Today, I have grown to love the styling of both cars from the 70's, and would even consider owning one.


Eleanor?


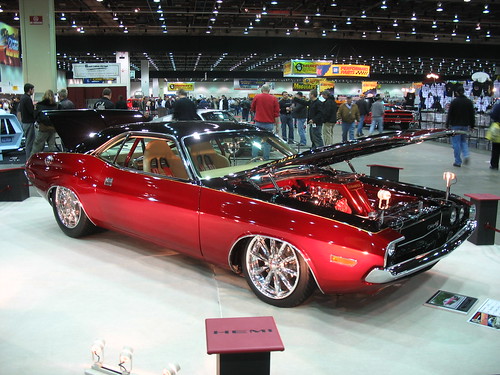
One of several customized Dodge Challengers. While I like most of the customizations, especially the flush/painted bumpers. About three cars had 18 in front and 20 inch tires on the rear, which I found the rears to look stupid in my opinion. One Cuda had 17's up front, 18's out back, which I consider to be the perfect combination.

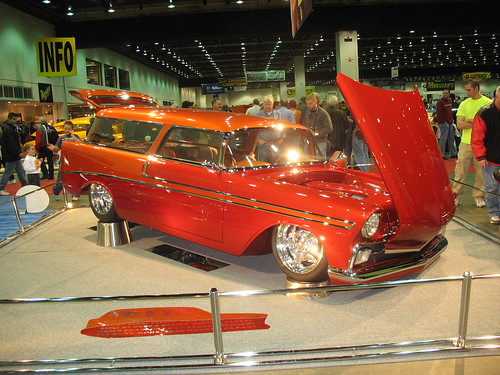
The perfect family truckster.


I could live with the 18's on the front, but again, the 20's out back just look too damn big and unproportional to the car. Muscle cars are meant to have some rubber on the rims, not rubber bands. Aside from that, this was yet another sweet customized Mopar.


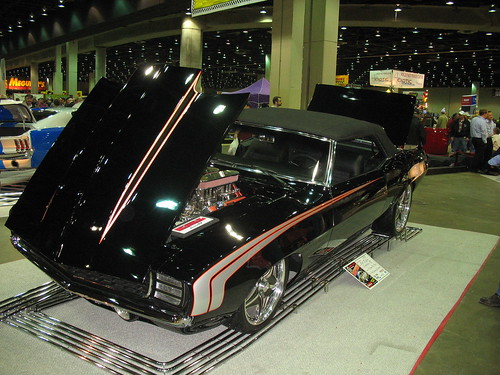
Awesome 1969 Camaro, most beautiful muscle car ever built in my opinion.


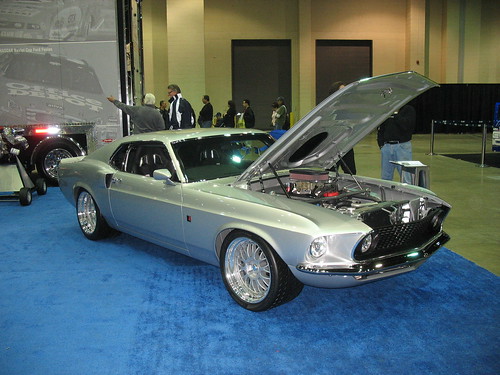
Nice lookin' Stang.


Prostreet will never die, nor will it ever look dated in my book.

Ah yes, the big wing thing.

Another badass Mopar, but look at those silly rear wheels/tires.

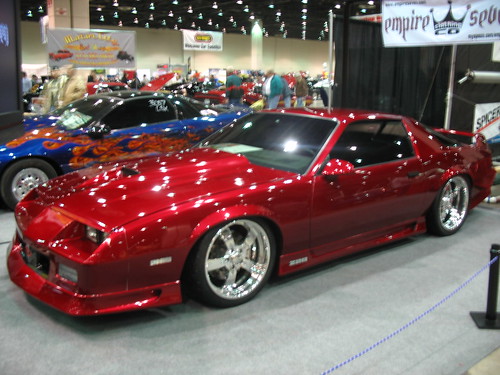
While no 3rd generation Firebirds were there, there were a few Camaros from the era. This with a sweet candy apple spray on it.

Slammed.


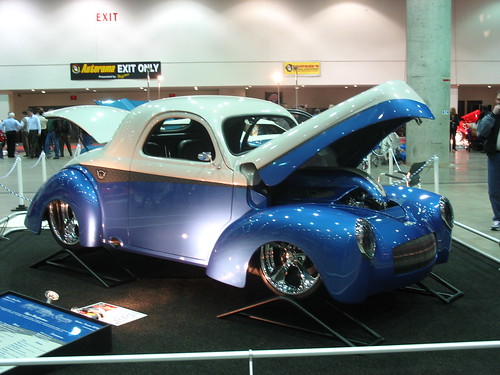
Willy's were cool when nobody had them. Now, anybody into hotrodding and money seems to have the need to build one. Still sweet, but like the much loved 1969 Camaro, an over abundance can sometimes water them down.

Some nice airbrushed flames.

And it burns, burns, burns!


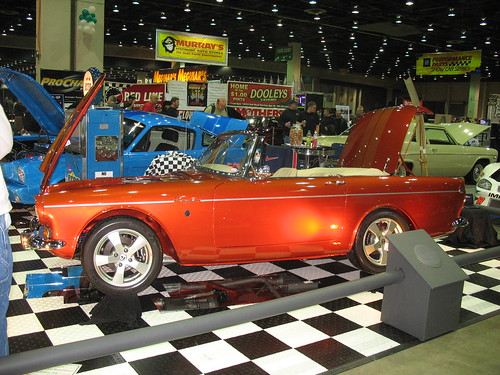
I never knew such a car even existed, until my days working at Ford when a coworker told me about them. Looks like a fun as hell car to me.

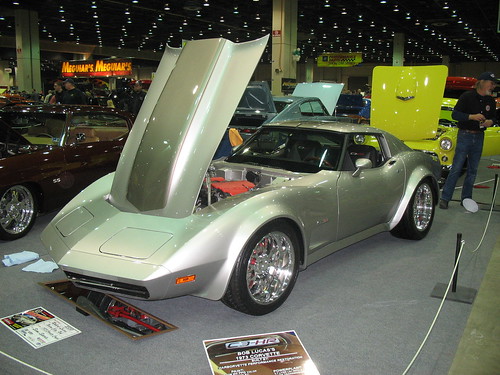
I never liked this generation Vette, in fact, I didn't much care for the generation after either. There was something about this car however, something I couldn't quite place my finger on. Maybe it was the big wheel/tire combo filling up the wheel wells, or the color. The body just seemed ultra smooth and flowing. Today perhaps I'll get a chance to bump into the owner and see if the body was modified in any way.

Update: I got to the show today and was able to talk to the builder about the car. I mentioned that while I typically don't like that style of Vette, there was just something about this one. He smiled and said "You wouldn't believe how many people have approached us at this show and said the very same thing." Seems there were many modifications done, though very subtle, they significantly change the appearance of the car. He allowed me inside the ropes to take a closer look, and point out the mods. The biggestest were the fender flares, which were blended into the body, and a custom rocker panel made to help the body lines flow. They also sharpened all of the body lines, which explained why everything looked so sharp. They also extended the rear spoiler about an inch. The guy admitted, he felt that Vette is one of the sexiest built, though thought Chevy left didn't finish it off right. They made the proper changes to create a product that appears much more polished.

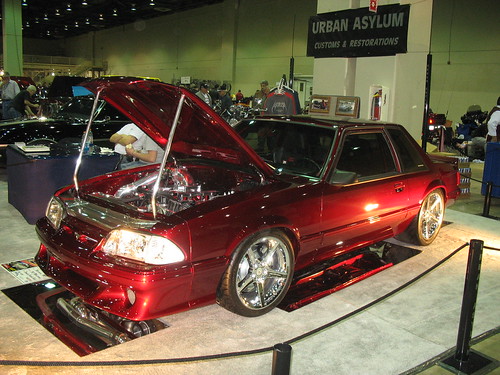
As stated before, I've always loved the LX notchback Mustang, even when the optional luggage rack is tossed on. Now the GT, you can keep them ugly ass boxes!


Never understood it, probably never will, it just is.

You can view the rest of my pictures from the show here: 2008 Detroit Autorama

Sunday, March 02, 2008

Boyd Coddington 1944-2008

Perhaps Boyd's best known creation, Cadzilla, owned by Billy Gibbons of ZZ Top


While on the phone talking with a friend about next weekend's Detroit Autorama, it was brought to my attention that Boyd Coddington passed away a few days ago. One of the great hot rod icons of the day, he will be missed by many.

Boyd Coddingtong 1944-2008

Saturday, March 01, 2008

Dragtimes.com

While surfing the net today, I came upon a site I had visited some years ago, even submitted my 1/4 mile time to. I was happy to see that I was on in the upper 1/3 in terms of 1/4 mile times. This site has a ton of very helpful information. Perhaps the most helpful is the ability to search out engine/vehicle combinations running 1/4 mile times that you wish to achieve. I'm going to add this site as a permanent link on the side bar.

Dragtimes.com

Just a simple oil change

Why is it the simplist things end up being so difficult? A week or two ago my girlfriend asked me to change the oil in her truck for her, as I had voluntarily suggested I do it after the last time she took it to an oil change shop. Aside from a couple of times when I was younger, I've always changed my own oil in all of my vehicles. I don't know what it is, but I simply don't like others touching my cars, and if need be, I have my friends who are mechanics do the work. Yeah, I'm one of them people who are sorta funny about their cars, as to me, they aren't just transportation. Even my 1990 Regal had a sort of sentimental value to me.

So having bought the oil and filter last week, I made it out to the gargage to change her oil today. After lying down on the creeper and checking out the clearance, it looked like there was plenty of room without jacking the truck up. Shouldn't take more than 10 minutes tops, or so I thought. I drained the oil, replaced/tightened the plug, then moved to the filter. Immediately I thought something was not right. Just by looking at the el cheap-o filter installed by the 10 minute oil change place I could tell it wasn't the same as the Mopar filter I had picked up. This long skinny filter was the polar opposite of the short fatty I had bought. I remained hopeful that perhaps the aftermarket one simply differed from the stock filter. When I tried to install the Mopar filter, all hope vanished, as there was no way this one was going on.

I was baffled, as the owner's manual called for part #5281090. These Dakotas came with either a 3.7 V6 or 4.7 V8, though I figured during an age where interchangeability between different engines is the norm, they simply must share the same filter. I looked on the internet with zero success. I tried Chrysler dealerships in metro Detroit, though all the parts departments around here closed at 1pm. So, I resorted back to Murray's, where I bought the filter from. In their defense, I didn't approach the counter and ask which filter the first time around. Why bother, as I had the owner's manual which stated the correct part number, right? Well, while on the phone, the parts guy found a different number, went and opened the box, and described a filter that compared to the one I removed, as opposed to the new one I had bought.

A quick trip up to Murray's got me the right filter, as well as the latest issue of Popular Hot Rodding magazine (I'm a sucker for car magazines). With the new filter installed and 5 quarts added, the 10 minute job was completed...about 1.5 hours after I started. A lesson was learned however, and I placed the top of the oil filter box in the owner's manual, so next time I know which filter to get without trying to go by the manufacturers recommendation.

Friday, February 29, 2008

The heart of the beast

Having made relatively little progress on my Camaro these past few years, even in regards to collecting the parts necessary to put it back together, I felt it was time to purchase at least something. That something was my solid roller lifters, with a $324 price tag.

I had ordered my cam a few years ago, a Comp Cams special grind with the following specs:

Duration @ .050 = 266/272
Lift = .678/.688
Lobe Separation = 110
Intake Centerline = 108

For those who know engines, yeah, this is one helluva cam for the street. I emailed Comp a few years back, told them what I considered "streetable," and what I was looking for with my engine build this time around. My goal was 650-700 hp, in addition to possibly a 250 hp shot of nitrous from a system I bought from a friend. I wanted the car to possess at least as good for street manners as before, or better. My engine I pulled out of my car was as follows:

454 .030 over
LS6 heads, ported and flowed
Comp Cams solid flat tappet .629/.605 lift, 260/266 dur @ .050
11-1 Cr
Victor Jr Intake
Barry Grant Race Demon 750
TH400 trans (manual)
12 bolt with 4.10 gears

This combo was good for 513 hp and 495 ft/lbs of torque on our SF901 dyno at college. Also good enough to run 11.70's in the 1/4 mile at 116 mph. The car was a beast on the street, so much so that even right up till before I pulled it off the road, it often scared the hell outta me. It was like trying to tame a beast that wasn't meant to be tamed when you jumped on the throttle, yet it never failed to put a smile across my face as I held on, trying to keep things in a straight line.

So why would I want to go faster you ask? Bragging rights I suppose. Anything over 500 hp on the street is a handful in my opinion, and for the most part, unusable. So what I'm building this car for is the drag strip. The desire to hustle down that 1/4 mile of asphault quicker is what led to me parking the car, gutting it (after a total restoration), and having a 12 point roll cage installed.

I'm still going to base my engine on my 454 block, though a new set of heads are in order, as well as some other components. My goal is to keep the car streetable, while dipping into the 9's with it. The finished product is a few years away, and this latest purchase is just one small step in terms of progress. Perhaps I'll try and get some of the smaller purchases out of the way in the coming year, as they can nickel and dime you to death as you near the end of your project.

Tuesday, February 26, 2008

Barry Grant Mighty Demon E85 carburetor


Since reading a handful of articles over the past year or two regarding E85, it got me considering an E85 friendly engine. The benefits are the ability to run higher compression, it's cheaper than race fuel, is more environmentally friendly (especially when compared to leaded race gas), and the cooling characteristics are also better. I have read up on how to convert a carb over to E85, which entailed some drilling and other modifications. I'd prefer one of the major carb manufacturers take the guess work out of such a conversion as opposed to me taking a drill to the carb myself.

I have been a fan of Barry Grant's Demon carbs since the day I first layed eye on them. They were a clean/mean looking carb, with all of the bolt on features you usually had to pay extra for with a holley. Well, companies made conversion kits for holley carbs, though I had yet to hear anything in regards to the Demon carb until this month's issue of Super Chevy magazine.

Barry Grant has announced that it's line of Mighty Demon carbs will now be available to run on E85. My girlfriend said I looked like a kid on a Christmas opening gifts when I read the news in front of me. The E85 carb will be available in 650, 750, 825, and 850 cfm versions. They will be identifiable by their gold base plate and metering blocks, and will be calibrated for street use.

I looked on Jeg's website to see if I could learn a little more about this Mighty Demon, as my previous carb on my Camaro was a Race Demon, which was on my Challenger R/T when I sold it to my dad. Sadly, it doesn't seem that even the 850 cfm version would work with my planned engine build, as they state the carb is good for cams up to 260 degrees duration at .050, and my roller in which I already have is 266/272 duration. Perhaps by the time I build my engine, more options on bigger carbs will be available. Then maybe I will also know whether E85 is a passing trend, or appears here to stay. Regardless, I was excited to hear BG now at least offers an E85 option.

Monday, February 25, 2008

Coming Soon: 2008 Detroit Autorama

Just a reminder that the Detroit Autorama is just a few weeks away, March 7-9. For more information, click here: 2008 Detroit Autorama. I'll likely take a few hundred pictures, as I did last year. I'll be sure to post them on here as well as my flickr account. If you missed my pictures from last year's show, here they are: 2007 Detroit Autorama.

Sunday, February 24, 2008

Replacing the turn signal switch on my 1989 Formula

About a year ago, my turn signals started acting up. They were still working, though the sequence was no long consistent. Sometimes the indicators would flash dimly, other times they would flash erratically. I knew something was going on then, but put off fixing it. At some point, perhaps 5 months ago, they quit working all together.

Life has been busy and I just haven't made time to get around to fixing it. In the back of my mind, I wondered if it wasn't a wiring problem related to the previous owners installation of a keyless entry system. I checked my fuses, saw a few power leads plugged into the fuse block that weren't stock, some in line fuse links that weren't stock, and some dangling wires that appeared to be grounds that were unhooked. I also looked for a relay or turn signal flasher, though found neither.

So, I simply assumed it was the turn signal switch. Made sense, considering the anti-theft device went out a few years ago due to a short in the column, so I figured the same was probably responsible for my current problem.

I could have probably ran up to the local parts store and got a turn signal switch, but I'd bet money it would be made in China. I've dealt with my fair share of subpar replacement parts, enough time to have learned my lesson.

So I turned to Year One, which stocks on the best in parts. I was surprised to find out there was a 3-4 week back order. Oh well, I'd rather wait and get a good product than rush out and buy junk at a local shop. (remember my fuel pump problem?).

So, when the part finally shipped about 3 weeks later, it never arrived. Come to find out, even though I entered my correct shipping address, they sent it according to what I had listed as my profile in their system. I didn't even realize I had a profile to be honest. Anyways, UPS lost it for about a week, though my package eventually showed up. A few more weeks passed, then this weekend I decided to tackle the project.


Prior to starting.


Removing the steering wheel cover.


Remove retaining clip on shaft.


Remove retaining nut from shaft, unplug red wire with white nylon housing (horn power).


Install steering wheel puller.


Remove steering wheel.


Remove black cover on column, this will expose the steering wheel locking plate.


Install tools to compress locking plate, allowing access to remove lock ring on shaft.


The lock ring, located at the tip of the screw driver.

.

I initially tried to use the proper tool, snap ring pliers. I have several interchangeable heads for these pliers, though none of them got the job done.

I then improvised, using two screw drivers to snake the lock ring out of the groove and up the shaft.

You can now remove the locking plate.


You will now see the turn signal switch.


Remove the large spring, for the locking plate, from the shaft.


Remove the z-shaped bracket in the top left corner by removing the screw. This connects to the turn signal lever.


Z-shaped bracket removed.

Remove the three screws retaining the turn signal switch.


Now remove the hazard switch. Be careful of the spring inside, as it wasn't until reassembly that I figured out what the low compression spring on the floor board went to.


Hazard switch removed.


Now remove the access panel under the dash, this will include two separate panels.


That clusterfuck of a mess was the remove keyless entry installed by a previous owner. Years have taken their toll on the lock solenoids, they no longer have enough power to lock the doors, so I've manually locked them for a few years. Thus, the keyless entry is worthless. In addition, the first owner of this car was paralyzed from the waist down, so it had a pedal on steering wheel conversion at one point, as well as a stereo system or two spliced in. Needless to say, I'm not sure how many electrical issues may be tied to the cars previous history.

The little black box! I've looked for this little bastard that runs the keyless entry a few times in the past, though never spotted it tucked away partially behind the driver's side kick panel.


Black box with the rat's nest of wires. At this point I became very skeptical if my new turn signal switch would fix my problem.


Thought my manual neglected this step, removing the four bolts attaching the column to the column support bracket, then removing the two nuts holding the bracket to the dash frame, make the job much easier. This is especially easier when it comes time to feed the wiring through the column.


I could now feed the harness up through the column and remove the old turn signal switch.
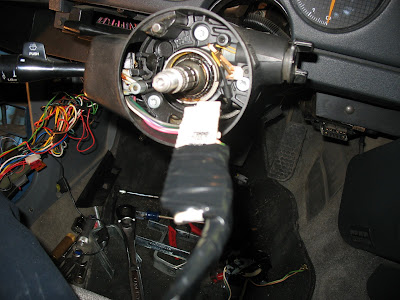

With the new harness taped up, I was ready to feed it down through the column. Ironically, the manual said to feed it up through the column, which is technically impossible consider the switch doesn't even come close to fitting in the bottom of the column.


New signal in place, time to reverse the steps and put everything back together.

New harness fed through, stamped "MADE IN THE USA." Wouldn't have got that at my local parts store!


Reinstall the hazard switch.


Tuck all this shit back up there out of sight and outta mind, at least for now.


Install the spring, then compress the lock plate far enough to install the lock ring. Oh yeah, REMEMBER TO INSTALL THE LOCK RING ON THE SHAFT FIRST, PRIOR TO INSTALLING THE TOOLS! I neglected this step, then had to remove the tools in order to get the lock ring on the shaft.


Lock plate installed.


Install the black plastic cover.


Align the steering wheel onto the shaft so that the splines line up, then use the backing nut to press the steering wheel back onto the shaft.


Place the retaining clip on the shaft, then plug in the red wire (horn power).


Install the center cover and the job is complete...so I thought.

After about 4 hours of work, everything was back together. This was moment of truth, one in which was disappointing to say the least. I quickly found out that my efforts were pointless, aside from the learning experience. My turn signals still did not function, and here I was back to square one. I am still very skeptical that the keyless entry isn't part of the problem, though have one other fix I'm going to try first. After calling a friend last night, he confirmed that there was indeed a turn signal flasher some place under the dash, though he didn't know where. He also felt that the signal flasher was the true cause of the problem. Some surfing the net last night, I realized why I couldn't find the flasher, it's tucked neatly behind the console area, conspicuously hidden. So today, I'm gonna pick up a flasher, make another go at it, and hope that it fixes my problem.

Update: Sure enough, the turn signal flasher was what it was. A couple dollar part and about 10 minutes later and my turn signal issues were fixed. Live and learn I suppose, wasn't the first time an initial repair didn't fix the problem, nor will it likely be the last. Funny thing though, I initially looked for the turn signal flasher under the dash, though couldn't find it, and guess I just forgot about it. The damn thing is tucked behind a metal bracket with a metal clip, completely hidden unless you know where to find it. Thanks to the internet, I knew where to find it this time around.

Saturday, February 23, 2008

Cylinder Head Porting Part 1

A-429 Motorsports head


I have decided to port my set of Ford Motorsports A429 aluminum Cobra Jet heads. I had initially decided against doing it because of the amount of time involved in performing this operation. Porting takes a LONG time (unless you are Supersport who knocked out his set of BBC heads in one afternoon). I will be the first to admit that another part of it was I didn’t exactly know what needed to be done. Anyone can take a grinder to a set of heads but who knows what kind of results they achieve! With cylinder head porting it’s easier to make things flow WORSE then better (Also I don’t have a Superflow flow bench in my garage either). Another part of me also thought that it would be unnecessary because I’m building a blower motor and the blower will force the air through the intake port as opposed to atmospheric pressure. But the Ford exhaust port leaves a little (OK a lot!) to be desired, so I decided to clean up the ports, bowls and combustion chambers. From what I’ve learned from the 460Ford cylinder head mafia is that the port geometry is basically correct, so I don’t need to re-engineer the ports.

My first observation is that these heads have the worst port wall surface finishes that I have ever seen on an aftermarket performance cylinder head. There is casting flash all over the place, and there is a metric ton of material around the valve guides that is not even remotely centered. A majority of my time will be spent in the bowl area trying to fix this critical transition area. Most of the airflow gains will be achieved right there.

Anyway, I started off by purchasing the correct tools for porting aluminum heads.

First of all I purchased an electric grinder. I had initially though I might just use my air grinder because I already had it and it was ready to go. But after researching it on the net I came to the conclusion that the electric grinder was the way to go. First the amount of electricity that I would using powering my 220v air compressor would be MUCH higher then the amount of electricity needed to power an electric grinder. Second is the electric grinder is MUCH more powerful. Actually, I have to be careful with the thing because I could do some SERIOUS damage to these heads if I’m not careful. Anyway, I got this electric grinder from Harbor Freight for $37 shipped to my door (which just the savings in electricity alone from not using the air compressor will pay for it). One thing I did have to deal with by using the electric grinder is how to adjust the motor speed. This grinder has no such control. After jumping on the net again I found an easy solution. I rigged up a dimmer switch and spliced it into an extension cord. BAM, thing works like a charm.

Second, I got a set of burrs that are designed especially for aluminum grinding. I’m sure anyone why has tried to grind on aluminum has seen how the aluminum tends to “gum” up on the bit (or grinding stone). These burrs have less cutting flutes and will not allow this to happen (Tip – keeping oil on the ports and cutting tools helps a lot). The only negative of these burrs is that they are expensive ($60 for the set of 3) and cannot be used on anything else.

Last, I purchased a polishing set that consists of 96 different cartridge rolls of varying sizes and grits. I got this from Summit for $29 and it was a steal in my book. It really does a good job of making the ports professional looking (and hiding all the little mistakes I’ve made so far!).

I'll keep you updated.

Peace.
WesleyJ
Matthew 16:16
Poor transition areas, guides not centered, lots of work needed.
Intake, casting flash and other obstructions.
Intake port, not symmetrical at all.
Electric grinder and light switch dimmer speed control.


Aluminum cutting tools.

Summit polishing set.