Sadly, the hot rod community has lost yet another of it's pioneers. Bill "Grumpy" Jenkins has passed on the the drag strip in the sky. I was lucky enough to meet "Da Grump" back in the 1990's at a PRI show in Indianapolis. Initially, I didn't even realize who he was. If memory serves me, Scooter Brothers (owner of Comp Cams) sent me to talk to Grump, I think as some sort of inside joke. I was at the show with my college instructor and fellow students from Central Michigan University's Automotive program (which sadly no longer exists either). I was passing out resumes to every performance company that would accept one.
I headed to the booth in which Scooter instructed me to, and was greeted by two elderly men...one friendly, and one grumpy. Sadly , I can't recall who the other guy was, but it was also a highly recognizable name. At some point, the guy said something to the effect "Excuse my friend, he can be a bit grumpy." At this point, I connected the dots, after he had introduced himself as either Bill, or perhaps Mr Jenkins, either way, I figured it out and was honored by the encounter.
I had also met Joe Mondello during that visit to PRI. Sadly, Mondello also passed away in recent years. It seems like with each passing month, as a new car magazine arrives, another legend has passed. Below is an article from BangShift.com.
Bill "Grumpy" Jenkins, One of Drag Racing's Greatest Drivers and Innovators passes at 81

Friday, March 30, 2012
Thursday, March 29, 2012
Air Cleaner for Dominator

Dominator w/1" spacer and K&N air cleaner assembly.
A few nights ago, I received another shipment from Summit Racing. This one included my air cleaner. I was very concerned as to whether or not this air cleaner, or ANY air cleaner was going to be able to fit under my hood. I have a 4" cowl hood, and previously had a 5" tall air cleaner w/drop base. Now however, I had a Super Victor intake by Edelbrock, which was 1/4" taller, a 1" carb spacer, and a Dominator, which may also raise the height slightly, I didn't measure the carbs to compare.

Dominator with 1" spacer/minus air cleaner.
My 14" diameter air cleaner I was replacing rubbed slightly on the hood where the cowl began to taper off in the front. The fact that you need a 16" diameter air cleaner to clear the Dominator, I was nervous to say the least. I ordered up my best bet, a K&N setup with a 1" drop base, 16" diameter, and 3.5" air cleaner and hoped for the best.
My initial install confirmed my fears, the hood wasn't even close to shutting. Discouraged, I headed back into the house to begin searching the internet for options. Aside from a place out of Canada, which makes one badass looking setup for $269 with a 2" drop base, there was nothing else. In addition, without a doubt I would be getting rid of the 1" carb spacer, as it was consuming valuable height I needed back. In return, I would be loosing the spot I had planned on drilling/tapping for my vacuum port. First things first though, I need an air cleaner and a hood that would shut. Going with a 6" cowl hood wasn't an option either. One, I don't like the look, simply too tall. Secondly, I don't care to spend another $500 on a hood that would also need painted.
Today I went out, took a few measurements, installed the air cleaner again, tried to see how much room I had to work with, then decided I was simply going to have to go with the $269 setup and figure it out from there if I still needed more room. Just as I was about to repackage the air cleaner to send back, I decided to remove the 1" spacer and take another measurement, and just make sure it wouldn't work.
To my surprise, the removal of the 1" spacer gave me JUST enough room. I took some putty and placed it on the air cleaner in multiple spots to check clearance. It seems I have a little less than 1/4" clearance to the hood, but it's clearance none the less, and my hood shuts w/o issue!

Dominator minus 1" spacer.
In the future, if I ever plan on using my nitrous plate kit, I will either have to find a slightly shorter air cleaner, or go with that 2" drop base setup. For now though, what I have will work, and that makes me happy as hell right now.

Dominator with K&N drop base air cleaner assembly.
Michigan State Police Cruisers - From Years Past
I was at the Michigan State Police training center a few days ago. I happen to stumble upon a few of their former patrol cars on display outside the facility. I remember seeing the Chevy Camaro from time to time as a kid, thinking "Man, now that is one badass cop car!" Even today I would still consider it one of the more intimidating cop cars to date.
In order, from top to bottom, is the Plymouth Gran Fury, Chevrolet Camaro, Ford Mustang, and Chevrolet Caprice. None of these cars are by any means a slouch! I'd love to take that Gran Fury for a spin, and couldn't help but think....


In order, from top to bottom, is the Plymouth Gran Fury, Chevrolet Camaro, Ford Mustang, and Chevrolet Caprice. None of these cars are by any means a slouch! I'd love to take that Gran Fury for a spin, and couldn't help but think....
"It's got a cop motor, a 440 cubic inch plant, it's got cop tires, cop suspensions, cop shocks. It's a model made before catalytic converters so it'll run good on regular gas. What do you say, is it the new Bluesmobile or what?" - Elwood


Tuesday, March 27, 2012
2013 Chevrolet Camaro 1LE
Chevy has announced that the 1LE will return as a performance option on the 2013 Camaro. Sadly, true to the 1LE tradition, it will NOT be a stripped down car void of luxury options. Instead, the car will remain "big boned" and acquire many suspension pieces from the ZR1 Corvette. The will without a doubt be a great handler, and serious competition for the Ford Boss Mustang. I guess I'm still just waiting for something a bit lighter, as the next generation Camaro promises to be. For more info check out the article in Car and Driver below.
2013 Chevrolet Camaro: The 1LE package returns to do battle with Ford's Boss Mustang
2013 Chevrolet Camaro: The 1LE package returns to do battle with Ford's Boss Mustang
Monday, March 26, 2012
One that got away
Ok, ok, maybe it didn't get away...but it was simply a car I had my eye on. I patrol a fairly depressing area of Detroit. On many streets, the vacant lots and abandoned houses out number the occupied dwellings. That said, there are a few stable areas, and every now and then, I will stumble upon a gem that catches me by surprise.
This particular gem was a 1970-1973 Chevy Camaro with Z28 badging. The car has been up on jack stands for a few years now. It was basically just a shell of a car. No rear, no rear suspension, no drivetrain, no wiring, and I'm almost positive the front suspension was gone as well. I hadn't been by the address in awhile and figured I'd drive by for a "well being check" on the car.
To my surprise, the car was gone! It had been sitting on a concrete slab, fenced in, next to a home. It just so happened that somebody from the home was on the front porch, seemingly curious as to what we were looking for. "Hey, you sell that Camaro?" He replied, "Yep, a friend bought it. Actually, in exchange for body work he did on a 1970 Nova SS I have." Ok, so this Camaro wasn't just some abandoned car that a person gave away to a scrapper for pennies on the dollar. I couldn't help myself, I had to ask "How much you sell it for? Was it a real Z28?" The car was sold for $1,100, or equivalent in work I assume, and yes, it was a real Z28. My jaw about hit the ground. His friend is building it into a pro street car, and the car was solid according to the owner, though it either already had, or required, a new frame because prior to being put up on stands it sat on the ground and took out the frame. I can only assume the pans and lower body panels may also have been worse than they appeared.
After some quick research, the market for these second gen Camaros isn't as high as I thought. Also, you were basically getting a shell and nothing more. That's fine, as I had visions of a pro-touring car, where the suspension and drivetrain all would have been replaced any way. Would have been a great/cheap platform to start with. I was at least happy to hear the car will be saved, rising from the ashes, and cruise the streets of Detroit once again. That's better than being melted down for scrap any day of the week.
Saturday, March 24, 2012
I'm done removing parts! (I think)
I think about about to the point where I'm done removing parts. My stock tank is now out, as is my fuel line, power feed, and wiring harness. I still need some odds and ends, such as fuel fittings,fuel line, gaskets, air cleaner, and a few other items I am probably forgetting, but the list is getting short. I may place an order today or tomorrow, in hopes of getting a few hours here and there over the next few days. I will be off a full week for Easter, and hope to get everything I have installed, and with a little luck, have her ready to fire back up.


Friday, March 23, 2012
Bangshift Gear
I received my Bangshift Gear along with stickers in the mail the other day. In exchange for permission to use my pictures from the Detroit Autorama. I think that was a pretty good trade! Both shirts are cool, but I'm really digging the shifter shirt on the left. Just in time for the upcoming cruise season.


Lojack For Your Classic Car
AmericanRodsandRides.com has teamed up with Lojack to offer owners of classic cars the protection of being able to locate their car in the event some douchebag steals it. The package is heavily discounted from the normal $695, knocking off $400, offering the service for just $295! (if my math is right).
To get the discount you will need to use the promo code: CCA1AR295.
For more information, call Lojack at 1-800-456-5225, or check out them out at Lojack for Classics.
To get the discount you will need to use the promo code: CCA1AR295.
For more information, call Lojack at 1-800-456-5225, or check out them out at Lojack for Classics.
Thursday, March 22, 2012
"Top 11 Cars We Wish We Could Have Bought New" - Bangshift.com
Bangshift.com made a list of the Top 11 Cars We Wish We Could Have Bought New. I've made my own lists over the years in my head, from cars on my dream list, engines I'd like to build, and automotive events I'd like to participate in. Yet I never really thought about a list of cars I'd like to go back in time and have bought new. While I like many of the cars listed, and some will make my list, here are my 11, in no particular order.
1941 Willys Americar - I have to agree with Bangshift with this pick, though I didn't realize it wasn't "all that" back in the day. Today, I would argue that the Willys is by far my favorite street rod ever built. I'd love to build one with over the top power.
1981 DMC-12 - I'm not sure why this car is such an attraction for me. It really isn't a good looking car. In fact, it's rather ugly. The front, the rear, the side...I can't say it has a "good side." The gull wing doors on this car even looked awkward in my opinion. It's underpowered, and really wasn't all that sporty then, or even now. Yet it's unique, it's different, and if I could go back, it's a car I would have bought new. Yeah, I know, they are still making them somewhere down in Texas...but I don't want one that bad. HAHA
1965 Ford Cobra 427 - A rocket ship on wheels. I know that these cars, offered as a kit, are a dime a dozen today. Yet even as diluted as the market is with all the kits, there is a reason they sell so many of them. This car just looks damn good! Small, light, and packing one mighty punch, it's reminds me of a street legal go-cart.
1963 Corvette 427 Split-Window - Perhaps the only two seat car that I would probably take over the Ford Cobra was the 1963 Split-Window. In my book, it is, to this day, the best looking Corvette ever built. Perhaps shockingly, the split window didn't go over so well and was killed rather quickly, though today, it's highly collectible and easily making my list.
1987 Buick GNX - I know that the 1970 Buick GSX held it's own fame, but in my book, the 1987 Buick GNX takes the award for baddest of the bad Buffords. Thinking outside the box, taking a Regal with it's plush interior, and adding a killer engine under the hood that outright embarrassed the Vette that year. As the last year for the the rear wheel drive platform, Buick truly went out with a bang and left it's skid marks in automotive history.
1962 Plymouth Savoy Max Wedge - I agree with Bangshift on this one too. This is my wife's dream car, and I have no problem fulfilling that dream one day. I only partially agree with Bangshift regarding it's looks. It is ugly, but it's so damn ugly that it's cool. Talking about breaking the mold, this car looked like nothing else out there.
1962 Ford Galaxie Thunderbolt - Another bangshift pick, but I'd add the Thunderbolt as my selection. A factory race car, it doesn't get much better than this.
1948 Tucker Torpedo - It truly is a shame that Preston Tucker couldn't have succeeded with his car. In my opinion, it was THE best looking car at the time. In my opinion, it's unique styling would even place it amongst the best looking cars on the market today. If I were to pick a #1 from this list, this would surely be in the running, if not the winner.
1969 Boss 429 Mustang - This was Ford's hemi! Arguably one of Ford's proudest moments, and one of my favorite year Mustangs to boot.
1969 Camaro ZL1 - I obviously have a soft spot for 1969 Camaros, and this particular model enjoyed the limited run of 69 cars, making it extra rare. The all aluminum 427 was a track terror, and to this day, the fastest factory Camaro ever built.
1971 Hemi Cuda - As much as I'm a diehard Chevy fan and lover of big block Chevy power, there is no denying the appeal of the Hemi. Arguably the most recognizable engine for the masses from the muscle car era, it is the reason the hemi name and engine was resurrected, and enjoys it's fame today. In my opinion, the 4 headlights on the 1971 were by far it's best looking year. I love the 1970 Challenger nearly as much, but given the choice, I'd take the Hemi Cuda...it just rolls off the tongue better.
So there is my pick. Who knows, if I were to ever win the lottery, perhaps I could realistically fulfill that list. Sure would be a fun stock of cars to possess!
Friday, March 16, 2012
This car is fighting me tooth and nail!
I'm beginning to think my car doesn't wanna be put back together. Last night, my latest package from Summit Racing arrived. Included was my 1" carb spacer, carb studs, water neck, gasket, and longer intake bolts due to the thicker flange of the Super Victor intake.
I couldn't wait until morning to see how the spacer fit, so shortly after midnight I ventured out to the garage. As it was, the side linkage on the Holley Ultra Dominator interfered with the intake, just barely. A couple knicks on each side with a die grinder would have allowed for enough clearance, but I really hated to grind on a new intake, especially if the recommended 1" spacer solved the problem. Thankfully, the spacer solved the interference issue.
My dad surprised me by arriving early morning to babysit, when he didn't need to be here until 3. This allowed me time in the garage to start getting my car buttoned up. I started by replacing the intake bolts. I had installed about 8 of the 12 intake bolts I had previously, though realized they were too short, I figured they were good enough to allow the RTV to setup and allow the adhesive to hold the gaskets in place. As I began replacing the bolts one by one, I soon realized that one of the threads had got cross threaded, possibly from installing the shorter bolts and torquing it a tad too much. With no other option to clean up the thread in a hole with the least amount of space, due to the intake runner, I had no choice but to pull the intake.
Word of advise, after several attempts, I found the best/easiest way to break loose the intake is to run a razor blade through the RTV at the front, then find a spot to pry up on the intake, and it popped loose. Just take great care not to break off the blade, as it could find it's way down the lifter valley. Luckily, no blade broke. With the intake free, I cleaned up all the mounting surfaces. The adhesive on the gaskets worked much better than I thought, and made cleaning the gasket off the heads a real pain in the ass.
Luckily, so I thought, I had an extra set of BBC intake gaskets hanging on the peg board. I was hoping to get the intake back on top of the engine, only to discover that the intake gaskets weren't the same thickness as the AFR gaskets, and the design was slightly different around the ports, creating a situation where a good seal would not have been made had I installed them. Another order to Summit Racing was made, this time for a set of intake gaskets and a fuel block off plate.
With nothing accomplished thus far, I decided to at least install the carb studs and spacer on the intake. It made me feel only remotely better, knowing at least one thing was completed for the day. I sat the carb on top, for nothing more than my own satisfaction.
As I went back into the house, I began looking at Craftsman tap and die kits. Then it hit me, while I don't have a tap and die set, I do have a thread chasing (or re-thread) kit which may fix my threads. After some digging in the top of the tool box, I found my set and proceeded to fix my bad threads, and clean up all the other threads as well. While the day was pretty much a wash, once the intake gaskets arrive, everything should start going a bit more smoothly!
 Was nice while it lasted, but soon it came back off.
 Off it goes!
 I really thought my collection of gaskets were going to come in handy today.
 Studs installed.
 Spacer installed.
 Carb sitting on top.
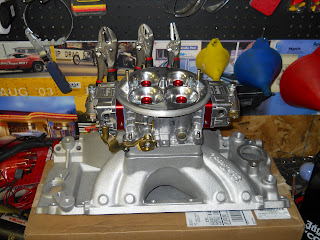 I can't wait to have this combo atop my engine. It's much more intimidating than the combo it replaces. I will have to get a new/shorter air cleaner assembly to keep from interfering with my hood.
Wednesday, March 14, 2012
Intake installed...sort of.
With my intake bolt recovered, I could now move forward. First thing was first, I wanted to get that intake on so that lifter valley was covered up. I put my gaskets in place, ran my beads of RTV, and let it sit for 10 minutes. I then sat the intake in place and began running the bolts in...and I realized yet another difference with this intake, the flange is thicker...or my intake bolts shrank. A comparison to my Victor Jr confirmed it, the Super Victor intake does in fact have a thicker flange. I was able to get about 8 of 12 bolts installed, though at about 2 threads top. A call to Edelbrock confirmed it, though they didn't have a part number, they suggested 1/4" longer bolts. A call to ARP got me the part number I needed.
In addition to the bolts, I ordered up a new water neck/gasket, a 1" carb spacer, and longer carb studs to account for the spacer. Of course, I forget the fuel pump block off plate, but there is always something and I have plenty of fuel line and fittings to order in the near future. I then went back to working. I removed the starter along with the front clip wiring. All the wiring is ready to pull through the firewall. The rear clip won't take long, and there really isn't much wiring inside the car. Once removed, I can start routing the new harness.
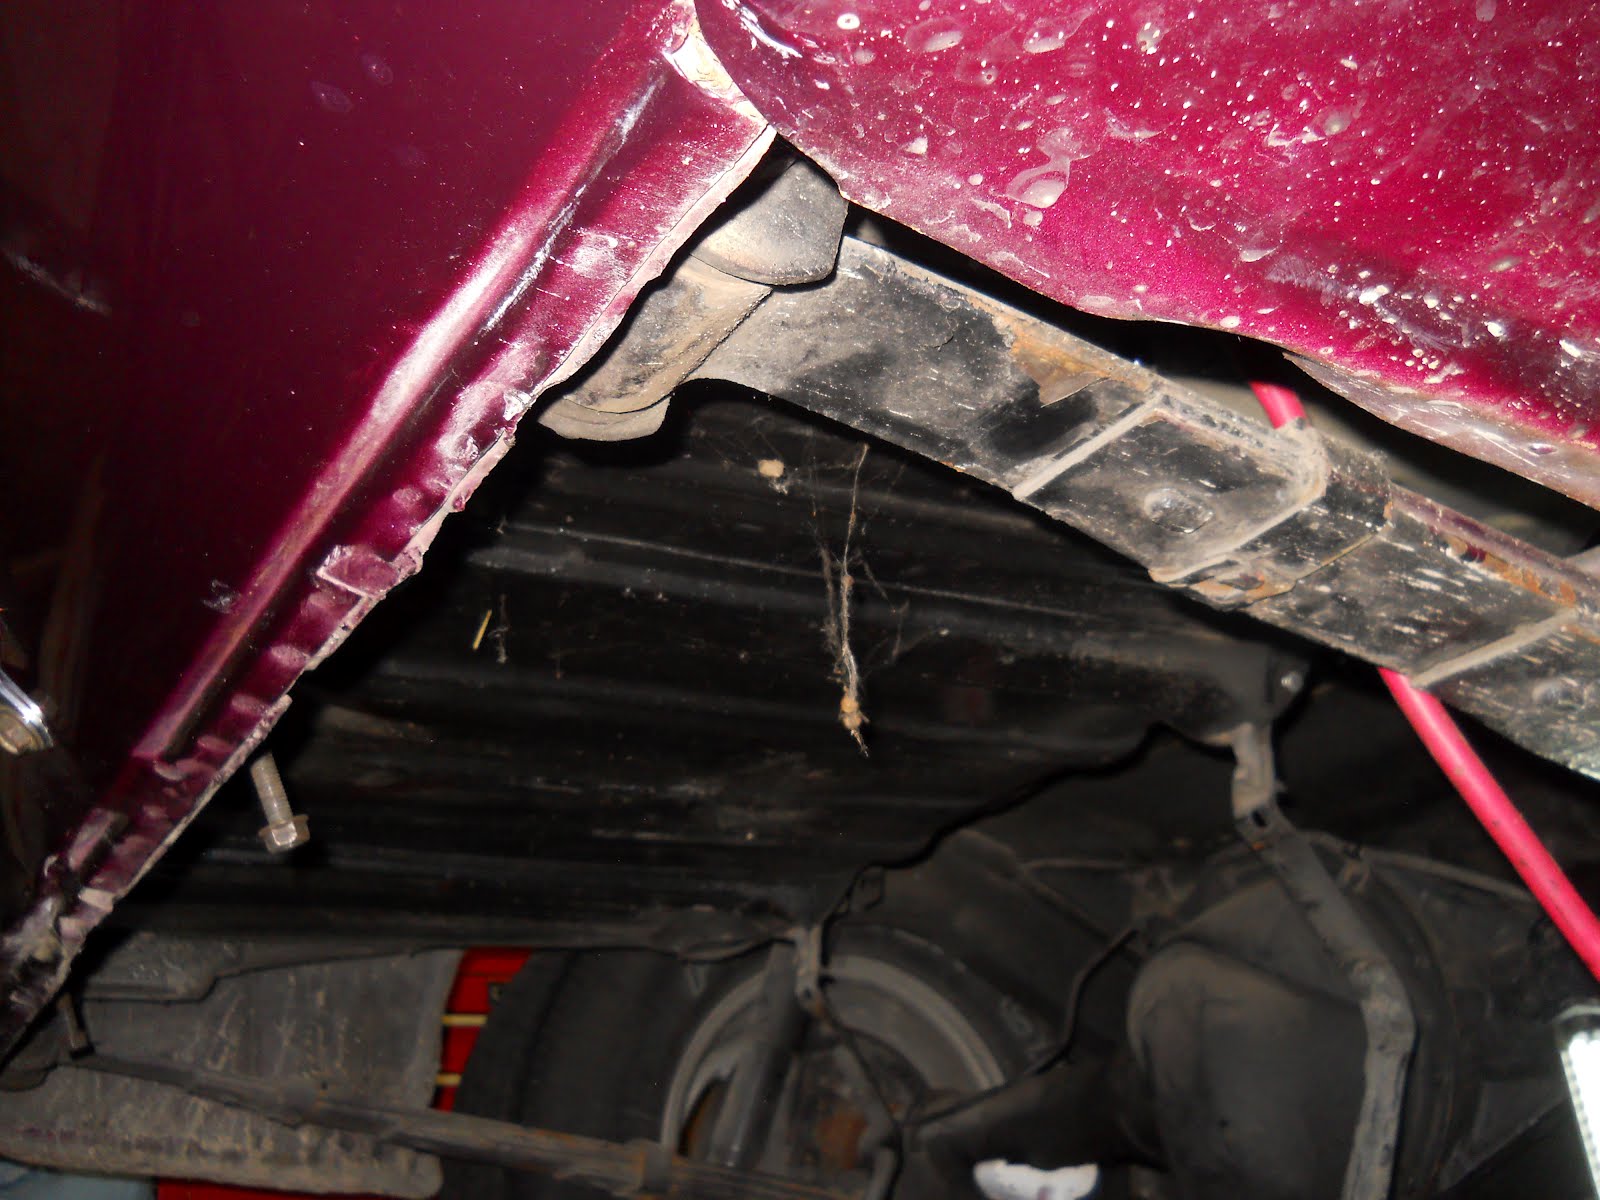
While I obviously couldn't install the carb, I did sit it atop the intake, just to see how it looks. I really hate to cover the thing up with an air cleaner! I took a look at the oil pan, realized that the gasket had actually ripped while trying to lower the pan. The new one was already on the way, so for the time being, the pan was left loose. Steady as she goes, but at least she's going forward.


In addition to the bolts, I ordered up a new water neck/gasket, a 1" carb spacer, and longer carb studs to account for the spacer. Of course, I forget the fuel pump block off plate, but there is always something and I have plenty of fuel line and fittings to order in the near future. I then went back to working. I removed the starter along with the front clip wiring. All the wiring is ready to pull through the firewall. The rear clip won't take long, and there really isn't much wiring inside the car. Once removed, I can start routing the new harness.
While I obviously couldn't install the carb, I did sit it atop the intake, just to see how it looks. I really hate to cover the thing up with an air cleaner! I took a look at the oil pan, realized that the gasket had actually ripped while trying to lower the pan. The new one was already on the way, so for the time being, the pan was left loose. Steady as she goes, but at least she's going forward.


Tuesday, March 13, 2012
Tekton 24" Flexible Magnetic Pick-Up Tool
This tool deserves a shout out, and the company that makes it has been added under the tools header off to the side. Michigan Industrial Tool - Part# 7611. Here is a link to the tool.
Tekton 24" Flexible Magnetic Pick-Up Tool

Tekton 24" Flexible Magnetic Pick-Up Tool

Butter Fingers
Last Friday I dug into the Camaro. I started out by removing the intake, with plans to install my new Edelbrock Super Victor in place of the Edelbrock Victor Jr. After the intake was removed, I placed some paper towels in the lifter valley, cleaned up the gasket residue, and placed the new intake gaskets in place after applying some gasket adhesive. I applied the RTV in front and back, and then needed to install 4 intake bolts to hold the gasket in place, as the adhesive wasn't doing it.
After I installed the first bolt, I immediately removed it. I decided it wasn't a good idea to leave the washers on, as I could see one falling off into the valley and through the engine. After removing the washers, I reinstalled the bolts. I let the RTV cure for 10 minutes, and here is where I messed up...I removed the paper towel. Upon removal of the intake bolts, one slipped, fell in the lifter valley, rolled over the cam lobe, then down she went....TINK! I heard it hit the oil pan, which was a good thing in my mind.
I quickly realized I wasn't retrieving the bolt from above, and was surprised it was even able to make it down. I was really kicking myself for removing those paper towels, but what was done was done. I pondered the situation over a few beers, then decided I needed to drop the pan and see if I could create enough room to retrieve it with a magnet. Several attempts with my flexible magnet proved too much for my 15 year old tool, and it's flexible life came to an end with a snap.
A trip to several stores left me empty handed in regards to a replacement. I instead picked up a smaller mirror, as the one I had was too large (the new one still didn't work), a telescoping magnet, and 25 lb strength round magnet. All proved insufficient, and a make shift repair of my flexible magnet using solid core wire was short lived, as the remainder snapped again. I wasn't confident the magnet was enough to pick up the bolt any way, as it seemed barely strong enough to lift a bolt, let alone attract it in an oil pan. I resorted to Amazon.
I located a 24" flexible magnet made by Tekton, a Michigan based company out of Grand Rapids, though sadly, the tool is made in China. Still, this baby was a life saver! Within 5 minutes I located the bolt, within 10 I had it recovered! I have an oil pan gasket on the way, but I think I can reuse the one in place, with a few dobs of RTV in the corners. Tomorrow, I will be back on track, and progressing forward. Below are some shots of my progress thus far.


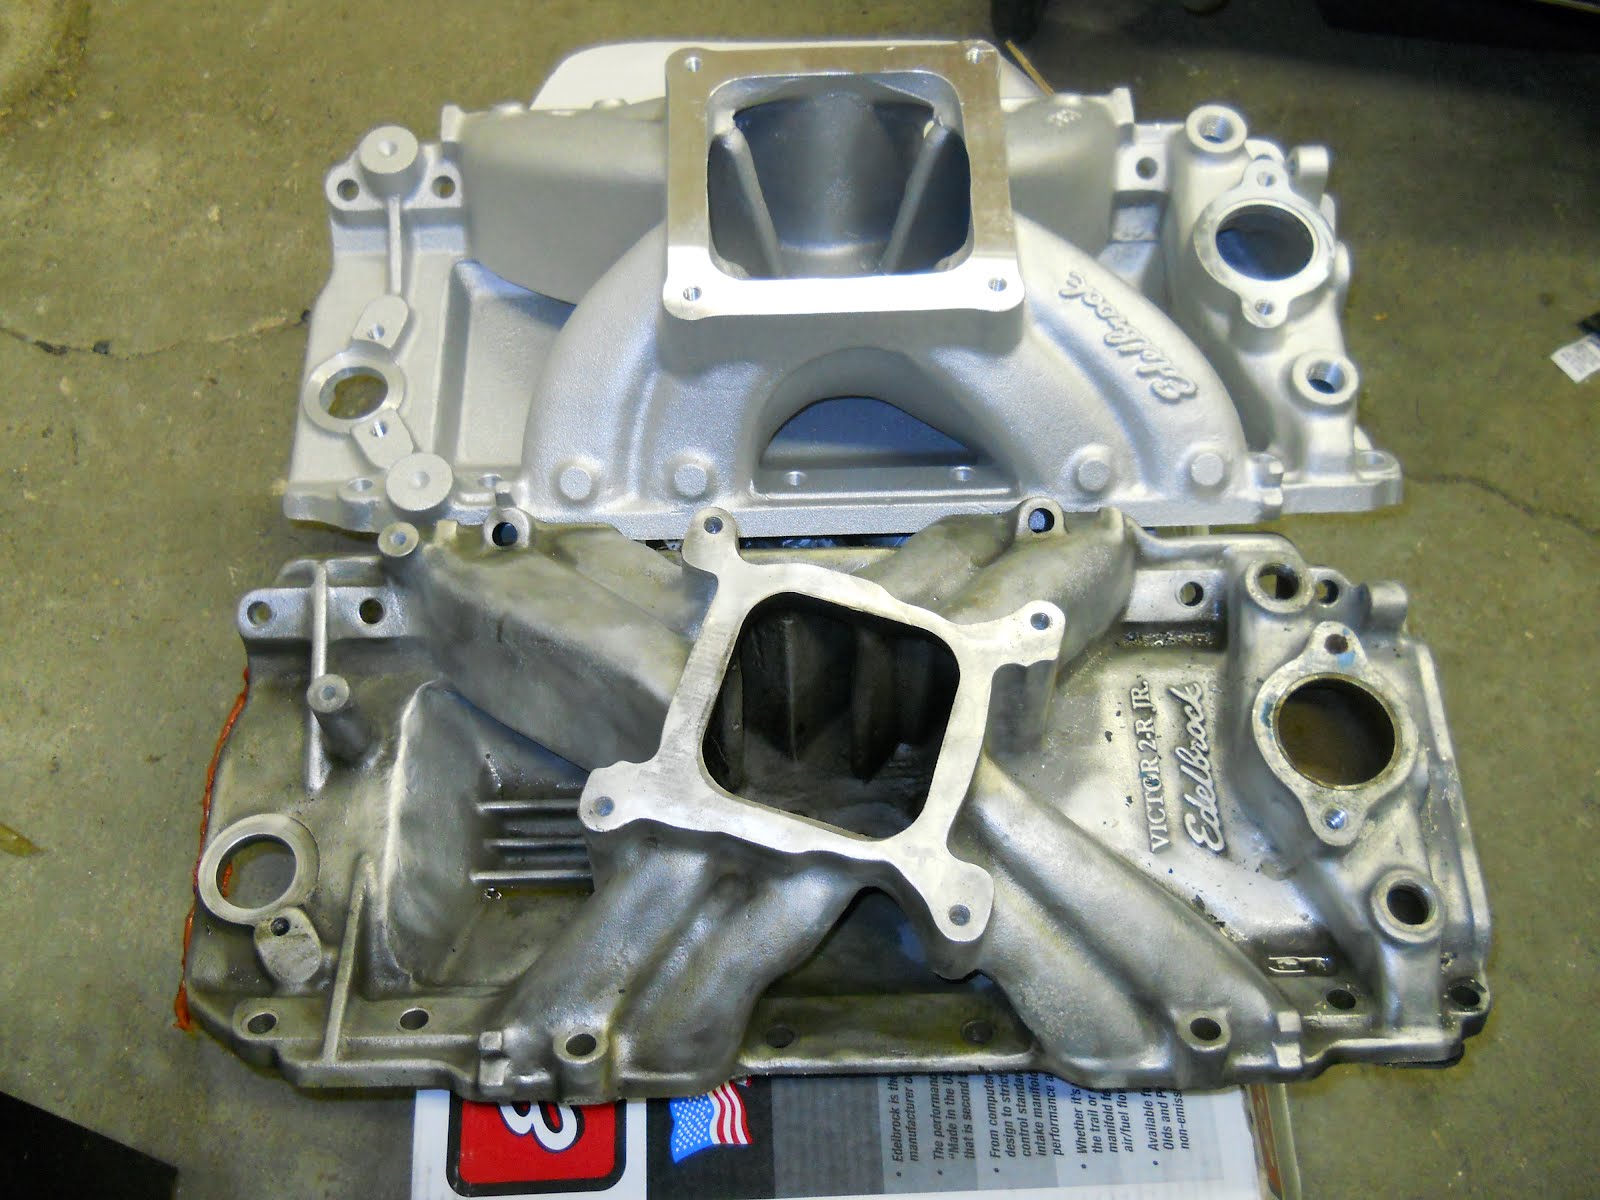
The size difference between the inakes was surprising. The carb mount, the size of the runners, and the overall height of the new runners is quite obvious.


 Here is the little bastard that caused my sleepless nights.

 Here is the tool that saved my ass...or at least saved me from having to pull my engine. Can't say enough about how handy this magnet proved to be.
After I installed the first bolt, I immediately removed it. I decided it wasn't a good idea to leave the washers on, as I could see one falling off into the valley and through the engine. After removing the washers, I reinstalled the bolts. I let the RTV cure for 10 minutes, and here is where I messed up...I removed the paper towel. Upon removal of the intake bolts, one slipped, fell in the lifter valley, rolled over the cam lobe, then down she went....TINK! I heard it hit the oil pan, which was a good thing in my mind.
I quickly realized I wasn't retrieving the bolt from above, and was surprised it was even able to make it down. I was really kicking myself for removing those paper towels, but what was done was done. I pondered the situation over a few beers, then decided I needed to drop the pan and see if I could create enough room to retrieve it with a magnet. Several attempts with my flexible magnet proved too much for my 15 year old tool, and it's flexible life came to an end with a snap.
A trip to several stores left me empty handed in regards to a replacement. I instead picked up a smaller mirror, as the one I had was too large (the new one still didn't work), a telescoping magnet, and 25 lb strength round magnet. All proved insufficient, and a make shift repair of my flexible magnet using solid core wire was short lived, as the remainder snapped again. I wasn't confident the magnet was enough to pick up the bolt any way, as it seemed barely strong enough to lift a bolt, let alone attract it in an oil pan. I resorted to Amazon.
I located a 24" flexible magnet made by Tekton, a Michigan based company out of Grand Rapids, though sadly, the tool is made in China. Still, this baby was a life saver! Within 5 minutes I located the bolt, within 10 I had it recovered! I have an oil pan gasket on the way, but I think I can reuse the one in place, with a few dobs of RTV in the corners. Tomorrow, I will be back on track, and progressing forward. Below are some shots of my progress thus far.


The size difference between the inakes was surprising. The carb mount, the size of the runners, and the overall height of the new runners is quite obvious.


 Here is the little bastard that caused my sleepless nights.
 Here is the tool that saved my ass...or at least saved me from having to pull my engine. Can't say enough about how handy this magnet proved to be.
Monday, March 05, 2012
New Parts Spread
While the wrenches haven't come out to start putting on the parts, I thought I should at least get everything out and take some nice pictures of what will soon be going on my car. Over the past month, this is what I've had delivered.
 Here is the gas tank from Glenn's Performance with rear sump.
 Here is my fuel system. Aeromotive A1000, bypass regulator, and two filters. All with -10 AN fittings, this will move some serious fuel!
 The King of Carbs, an 1150 Ultra Dominator Race carb.
 A look down the 4 barrels.
 To give you a better understanding of the size of this monster.
 Edelbrock Super Victor Intake.

 Topped off with the King.

 The total package. In addition to the items above, there's an MSD cap/rotor, set of 8 Autolite plugs, intake/exhaust/distributor gaskets, and rtv.
It's getting down to the wire, considering how much work I have ahead of me. A lot of it is pretty straight forward. The new wiring harness, proper relays, and controllers/toggles will be the most time consuming. As long as I can find a good 2-3 solid days to work over the next few months, I should have no problem hitting the road by the first week of June. That's the plan!
 Here is the gas tank from Glenn's Performance with rear sump.
 Here is my fuel system. Aeromotive A1000, bypass regulator, and two filters. All with -10 AN fittings, this will move some serious fuel!
 The King of Carbs, an 1150 Ultra Dominator Race carb.
 A look down the 4 barrels.
 To give you a better understanding of the size of this monster.
 Edelbrock Super Victor Intake.
 Topped off with the King.
 The total package. In addition to the items above, there's an MSD cap/rotor, set of 8 Autolite plugs, intake/exhaust/distributor gaskets, and rtv.
It's getting down to the wire, considering how much work I have ahead of me. A lot of it is pretty straight forward. The new wiring harness, proper relays, and controllers/toggles will be the most time consuming. As long as I can find a good 2-3 solid days to work over the next few months, I should have no problem hitting the road by the first week of June. That's the plan!
Subscribe to:
Posts (Atom)